In Angular Material you have a built-in directive for sorting tables, matSort. This short but concise tutorial will show you how to implement sorting functionality to a table component using Angular Material. Now, let’s dive straight into how to implement it.
Add Table
Let’s start by adding the table on which we’ll implement the sorting functionality.
I’m using Angular 17 in this example and everything is done in one Angular component.
Here’s a basic mat-table I’ve created, containing some dummy data based on an interface I’ve added in the same file as our component:
import { Component } from "@angular/core";
import { CommonModule } from "@angular/common";
import { Sort } from "@angular/material/sort";

@Component({
  selector: "app-hello-world",
  standalone: true,
  imports: [CommonModule],
  template: `
    <table matSort (matSortChange)="sortData($event)">
      <tr>
        <th mat-sort-header="name">Name</th>
        <th mat-sort-header="age">Age</th>
        <th mat-sort-header="city">City</th>
      </tr>

      @for (record of dataSource; track record) {
      <tr>
        <td>{{ record.Name }}</td>
        <td>{{ record.Age }}</td>
        <td>{{ record.City }}</td>
      </tr>
      }
    </table>
  `,
  styles: ``,
})
export class HelloWorldComponent {
  dataSource: DummyData[] = [
    { Name: "Vincent", Age: 17, City: "Stockholm" },
    { Name: "Pekka", Age: 87, City: "Helsinki" },
    { Name: "Mike", Age: 37, City: "New York" },
    { Name: "Lee", Age: 8, City: "Kuala Lumpur" },
    { Name: "Jed", Age: 42, City: "Sydney" },
  ];
}

export interface DummyData {
  Name: string;
  Age: number;
  City: string;
}
I recommend you to look through this code and understand what I’ve done but if you’re just interested in the sorting functionality, then you can copy this code and continue reading.
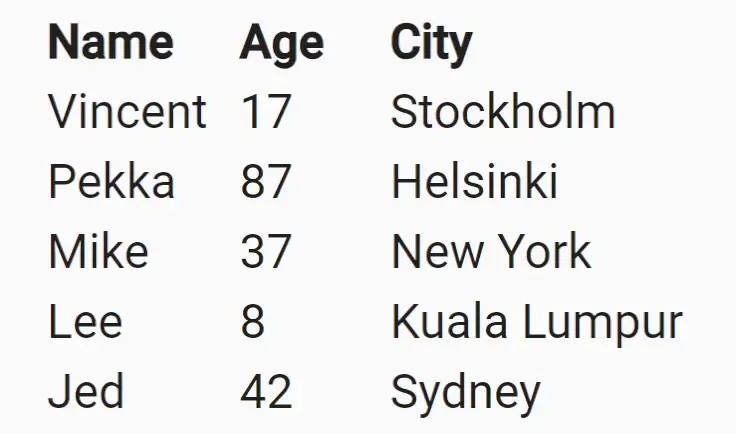
If you now run your application, you should have a table which looks like this:

Implement mat-table Sorting
Now that we have our table in place, it is time to implement the sort functionality on it.
For the sorting, we add a new shadow copy of our original array:
...
export class HelloWorldComponent {
  dataSource: DummyData[] = [
    { Name: "Vincent", Age: 17, City: "Stockholm" },
    { Name: "Pekka", Age: 87, City: "Helsinki" },
    { Name: "Mike", Age: 37, City: "New York" },
    { Name: "Lee", Age: 8, City: "Kuala Lumpur" },
    { Name: "Jed", Age: 42, City: "Sydney" },
  ];
  sortedData: DummyData[] = this.dataSource.slice();
  ...
Next, we need a function for sorting our data and save it to our sortedData array:
sortData(sort: Event) {
    const sortEvent = sort as unknown as Sort;
    const data = this.dataSource.slice();
    if (!sortEvent.active || sortEvent.direction === "") {
      this.sortedData = data;
      return;
    }

    this.sortedData = data.sort((a, b) => {
      const isAsc = sortEvent.direction === "asc";
      switch (sortEvent.active) {
        case "name":
          return this.compare(a.Name, b.Name, isAsc);
        case "age":
          return this.compare(a.Age, b.Age, isAsc);
        case "city":
          return this.compare(a.City, b.City, isAsc);
        default:
          return 0;
      }
    });
  }

  compare(a: number | string, b: number | string, isAsc: boolean) {
    return (a < b ? -1 : 1) * (isAsc ? 1 : -1);
  }
There’s a lot going on here so I think it’s best if we go through it so you get the hang of what we’re doing.
The first happening in the function is that we create a local variable based on the input parameter, sort. We need to do this because the input is of type Event but we want to work with an object of the type Sort, which contains the active (string) and direction (custom type SortDirection, ‘asc’ or ‘desc’) properties.
After we have parsed the input as an object of type Sort, we continue by checking if the user has the sort active or not, if it’s not active then we just set sortedData to the same as our original array.
If the user wants to sort the table, we determine which column we need to sort and then we loop through each row and compare it to the previous one to determine the order of each row.
That’s it! Hopefully, I managed to explain it easily enough.
Final Result
Now, it’s time to finally look at the final result of this tutorial. If you run your application you should be able to test out the table, sorting it by column by clicking on the headers, like this:

Conclusion
In this short tutorial, we’ve learned how to seamlessly add sorting functionality to the Angular Material mat-table component.
Firstly, we set up a basic mat-table with some sample data. Then, we continued with the actual implementation of the sort by creating a function that handles the sample data we initialized and sort it by looping through each record and comparing it against the previous record.
What we accomplished is – a table that responds to your clicking on its header columns and in turn sorts the data.
I hope you enjoyed following this tutorial… But, the learning journey doesn’t end here! Improve your Angular Material skills by exploring our other tutorials on Angular Material here.

