
In this article, we will walk you through the steps on how to implement authentication in an Angular app using Firebase.
Firebase is a popular tool for developing web and mobile applications because it provides a wide range of services, including authentication, to add to your app easily.
With Angular and Firebase, we can quickly set up secure authentication and start building the rest of our app. By the end of this tutorial, you will have a working authentication system in your Angular app.
Install Necessary Dependencies
Install the necessary dependencies. You will need to have the Angular CLI installed on your system. If you don’t already have it, you can install it by running the following command:
npm install -g @angular/cliYou will also need to install the @angular/fire and firebase packages, which will provide you with the tools you need to integrate Angular with Firebase. You can install these packages by running the following command:
npm install @angular/fire firebaseCreating Your Application
Create a new Angular project. Once you have the Angular CLI installed, you can create a new Angular project by running the following command:
ng new <project-name>Replace <project-name> with the name you want to give to your project. This will create a new directory with the given name and generate the necessary files for your Angular project.
Configure Firebase
Before you can use Firebase to handle authentication in your Angular app, you will need to create a new Firebase project and set up the necessary authentication methods.
First, go to the Firebase website and sign in with your Google account. Click on the “Go to Console” button, and then click on the “Add project” button. Follow the prompts to create a new project.
Once your project is created, click on the “Authentication” link in the left-hand menu.

Then, click on the “Sign-in method” tab, and enable the authentication methods you want to use (such as email/password or Google). Make sure to save your changes.

Next, click on the “Project Settings” button on the “Project Overview” menu at the top-left corner of the page.

Scroll all the way down to the “Your apps” section and click on the following button to add your application to Firebase.

After you have added your application to Firebase it will show you the necessary configuration settings for your Angular app. Copy the firebaseConfig object, which should look something like this:
const firebaseConfig = {
  apiKey: "YOUR_API_KEY",
  authDomain: "YOUR_AUTH_DOMAIN",
  databaseURL: "YOUR_DATABASE_URL",
  projectId: "YOUR_PROJECT_ID",
  storageBucket: "YOUR_STORAGE_BUCKET",
  messagingSenderId: "YOUR_MESSAGING_SENDER_ID",
  appId: "YOUR_APP_ID"
};
Integrate Firebase Into Your Angular Application
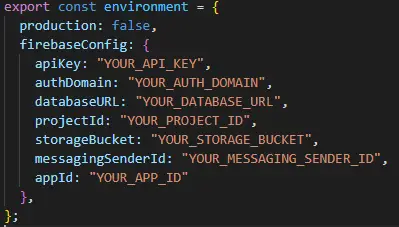
Open the environment.ts file in your Angular project, and paste the firebaseConfig object you copied earlier into this file after the production property. This will make the Firebase configuration available to your Angular app.
Now you’ll need to import the AngularFireModule and AngularFireAuthModule modules in your app.module.ts file, and then add them to the imports array.
// Import the necessary AngularFire and AngularFireAuth modules
import { AngularFireAuthModule } from '@angular/fire/compat/auth';
import { AngularFireModule} from '@angular/fire/compat'

// Import the firebaseConfig object you added to the environment.ts file
import { environment } from '../environments/environment';

...

imports: [
    BrowserModule,
    AppRoutingModule,
    AngularFireModule.initializeApp(firebaseConfig),
    AngularFireAuthModule
  ],
This will allow your Angular app to use the Firebase authentication features.
Your app.module.ts file should now look something like this:
import { BrowserModule } from '@angular/platform-browser';
import { NgModule } from '@angular/core';

import { AppRoutingModule } from './app-routing.module';
import { AppComponent } from './app.component';

// Import the necessary AngularFire and AngularFireAuth modules
import { AngularFireModule } from '@angular/fire';
import { AngularFireAuthModule } from '@angular/fire/auth';

// Import the firebaseConfig object you added to the environment.ts file
import { firebaseConfig } from '../environments/environment';

@NgModule({
  declarations: [
    AppComponent
  ],
  imports: [
    BrowserModule,
    AppRoutingModule,
    AngularFireModule.initializeApp(firebaseConfig),
    AngularFireAuthModule
  ],
  providers: [],
  bootstrap: [AppComponent]
})
export class AppModule { }Create the Login Page
You will now need to create a login form where users can enter their credentials to sign in to your app. To do this, you can create a new component using the Angular CLI, by running the following command:
ng generate component loginThis will create a new login directory with the necessary files for your login component.
Open the login.component.html file, and add the following HTML code to create a simple login form:
<form (submit)="login()">
  <div>
    <label for="email">Email:</label>
    <input type="email" id="email" />
  </div>
  <div>
    <label for="password">Password:</label>
    <input type="password" id="password" />
  </div>
  <button type="submit">Login</button>
</form>
Next, you will need to add the necessary logic to handle the login form submission and authenticate the user with Firebase. Open the login.component.ts file, and import the AngularFireAuth service. You will also need to inject this service into your component by adding it to the constructor.
import { AngularFireAuth } from '@angular/fire/compat/auth';

constructor(private afAuth: AngularFireAuth) {}Next, add a login() method to your component, which will be called when the login form is submitted. In this method, you can use the AngularFireAuth service to register the user with the email and password they entered in the form.
register() {
  // Get the email and password from the form
  const email = document.getElementById('email') as HTMLInputElement;
  const password = document.getElementById('password') as HTMLInputElement;

  // Use the AngularFireAuth service to sign in the user with the given email and
  //password
  this.afAuth.createUserWithEmailAndPassword(email.value, password.value)
    .then(() => {
      // If the login is successful, redirect the user to the home page
      this.router.navigate(['/']);
    })
    .catch(error => {
      // If there is an error, display a message to the user
      console.error(error);
      alert(error.message);
    });
}Make sure to import the Router service, and inject it into your component by adding it to the constructor. This will allow you to redirect the user to the home page after they have successfully signed in.
import { Router } from '@angular/router';

...

constructor(private afAuth: AngularFireAuth, private router: Router) {}Add Navigation Links
Finally, you will need to add the login form to your Angular app so that users can access it and sign in. Open the app.component.html file, and add a link to the login component:
<a routerLink="/login">Login</a>
<router-outlet></router-outlet>Then, open the app-routing.module.ts file, and add a new route for the login component. Your app-routing.module.ts file should now look something like this:
import { NgModule } from '@angular/core';
import { Routes, RouterModule } from '@angular/router';

import { LoginComponent } from './login/login.component';

const routes: Routes = [
  { path: 'login', component: LoginComponent }
];

@NgModule({
imports: [RouterModule.forRoot(routes)],Add a Loader Indicating Firebase Progress
You can add a isLoading variable to your component, which will be used to show a loading spinner while the login request is being processed.
import { Component, OnInit } from '@angular/core';
import { AngularFireAuth } from '@angular/fire/auth';

@Component({
  selector: 'app-login',
  templateUrl: './login.component.html',
  styleUrls: ['./login.component.css']
})
export class LoginComponent implements OnInit {

  // Variable to track the loading state
  isLoading = false;

  constructor(private afAuth: AngularFireAuth) { }

  ngOnInit() {
  }

  // Login method
  login() {
    // Set the loading state
    this.isLoading = true;

    // Get the email and password from the form
    const email = document.getElementById('email') as HTMLInputElement;
    const password = document.getElementById('password') as HTMLInputElement;

    // Use the AngularFireAuth service to sign in the user with the given email and password
    this.afAuth.createUserWithEmailAndPassword(email.value, password.value)
      .then(() => {
        // If the login is successful, reset the loading state and clear the form
        this.isLoading = false;
        email.value = '';
        password.value = '';
      })
      .catch(error => {
        // If there is an error, reset the loading state and display the error message
        this.isLoading = false;
        alert(error.message);
      });
  }
}Finally, you can add a loading spinner to your login form to indicate to the user that their login request is being processed. You can do this by adding the following code to your login.component.html file above the form:
<div *ngIf="isLoading">
  <svg width="48" height="48" viewBox="0 0 100 100" preserveAspectRatio="xMidYMid">
  <circle cx="50" cy="50" r="45" fill="none" stroke="#f00" stroke-width="10" />
</svg>
</div>
If you now run your application and go to http://localhost:4200/login you should see something like this:

If you fill in the form and click on Login the loader should be visible while your application calls Firebase for user registration.
When the loader has disappeared you can go back to the Users tab on the Authentication menu in Firebase. The user has been created and should now be visible in the list:

Additional Authentication Features
In addition to handling the creation of users, you will likely also want to implement other authentication features, such as user login, password reset, and logout. You can use the AngularFireAuth service and the methods it provides to implement these features in your Angular app.
For example, to implement user login, you can create a new login() method in your login component. This method can use the signInWithEmailAndPassword() method of the AngularFireAuth service to log in with the given email and password.
To implement password reset, you can use the sendPasswordResetEmail() method.
To implement logout, you can use the signOut() method.
Conclusion
In conclusion, authenticating in Angular using Firebase is a simple and effective way to add secure user authentication to your web application. By following the steps outlined in this article, you quickly implemented Firebase authentication to your Angular app, allowing users to register on your application.
I chose Firebase as an authentication platform for this tutorial because you can easily manage user accounts, track login sessions, and handle password resets on it. This makes it a powerful and convenient tool for building secured Angular apps.
I hope you enjoyed following this tutorial 🥰 If you did, you should check out our other Angular articles here.
Happy Coding!