Angular 17 was released on November 6, 2023, thus marking the start of a new era for Angular developers. Some developers even call this new release the start of the Angular Renaissance.
In this article, we’ll go through the new control flow blocks featured in Angular 17 and show you examples of how to use them. So, without wasting any more time, let’s get to it!
Prerequisite: Running Angular v17 or Greater
If you’re running an Angular version older than 17.0, you can easily update your version by following the easy steps described below.
Update nodejs to 18.13
Make sure you have a nodejs version >= 18.13. If not, you can easily update nodejs using nvm (Read more about how to install nvm here):
nvm install 18.13.0 && nvm use 18.13.0Update Angular CLI to Version 17
After you’ve installed the newer version of nodejs and made sure you’re using it, you can continue installing version 17 of the Angular CLI:
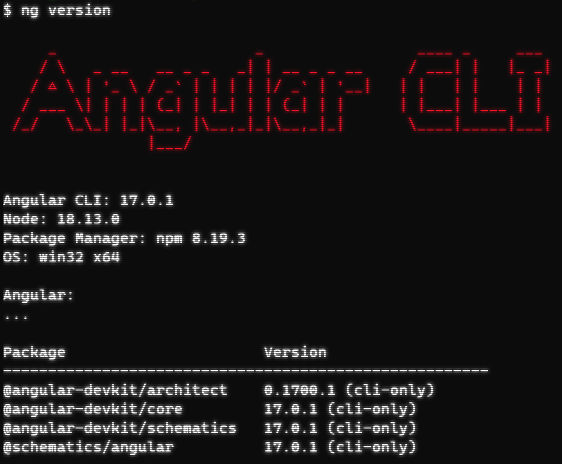
npm i @angular/cli@17.0.0If you now run the ng version command, you should see an output similar to this one:

So, that was the prerequisite. You’re now ready to continue and explore the new control flow block features of Angular 17.
Angular Control Flow Blocks
One of the major features of Angular 17 is the introduction of new control flow blocks. We have the if-block, for-block, and the switch-block.
We will go through each new control flow block and compare them to the previous old blocks, the ngIf, ngFor, and ngSwitch.
@if vs ngIf
Let’s say we have two variables in our Angular component:
x = 2;
y = 3;
If we want to print the one that is bigger using the old way, we’d do something like this:
<p *ngIf="x > y; else yIsBigger">X is bigger</p>
  <ng-template #yIsBigger>Y is bigger</ng-template>
But, with the help of the new @if block, we can accomplish the same result but a bit cleaner:
@if (x > y) { X is bigger } @else { Y is bigger }You can use multiple else if statements if you want to, like this:
@if (x > y) { X is bigger }
@else if (y > x) { Y is bigger }
@else if (y > x + 20) { Y is much bigger }
@else { X and Y is equal }
That’s pretty much the difference between the new @if block and the old *ngIf statement.
@for vs ngFor
The new @for block is very similar to the *ngFor loop and it also features the same variables:
| Variable | Type | Description |
$count | Number | The number of items in the collection you iterate over |
| $index | Number | The Index of the current row |
| $first | Boolean | Whether the current row is the first row |
| $last | Boolean | Whether the current row is the last row |
| $even | Boolean | Whether the current row index is even |
| $odd | Boolean | Whether the current row index is odd |
Here’s how you iterate through an array in Angular using the @for block:
@for (user of users; track $index) {
  <p>User {{ $index + 1 }}: {{ user }}</p>
}
If you wish to inform the user if there’s no item in the array, you can add the @empty block right after the @for block, like this:
@for (user of users; track $index) {
  <p>User {{ $index + 1 }}: {{ user }}</p>
} @empty {
  No users found
}
And that’s all there is to @for blocks. Last up, we look at the @switch block.
@switch vs ngSwitch
There’s really not much to cover here, the big difference that we want to show is how the syntax differs between the two methods.
Let’s go through an example where we want to print out if a person is a kid, teenager, adult, or elderly depending on the age of the person.
Using *ngSwitch it may look something like this:
<div [ngSwitch]="user.age">
  <p *ngSwitchCase="let age when age < 12">User is a kid</p>
  <p *ngSwitchCase="let age when age >= 12 && age < 18">User is a teenager</p>
  <p *ngSwitchCase="let age when age >= 18 && age < 65">User is an adult</p>
  <p *ngSwitchDefault>User is an elderly</p>
</div>
If we instead use the new @switch block, we end up with the following:
@switch (true) {
  @case (user.age < 12) { User is a kid}
  @case (user.age >= 12 && user.age < 18) { User is a teenager }
  @case (user.age >= 18 && user.age <= 65) { User is an adult }
  @default {User is an elderly }
}
In my case, I had to hardcode true to my switch block since my cases have value intervals.
An easier and better example of the @switch block is this one:
@switch (myValue) {
  @case (1) { The value is 1 }
  @case (2) { The value is 2 }
  @case (3) { The value is 3 }
  @default { I don't wanna know what the value is 😆 }
}
Conclusion
The new control flow blocks in Angular are both cleaner and faster to use than the previous ngIf, ngFor, and ngSwitch statements.
A big benefit of the new control blocks is that you don’t need to add HTML elements only serving as containers for the statements. Now, you can add control blocks as standalone blocks in the template, as compared to the old way where you often had to add a placeholder, like a div element, just so you can define your statement.
So, as you can see for yourself, this new way of adding logic and controlling the Angular template both looks better and improves performance.
Did you know we have more articles and tutorials about new Angular features? Another technique a lot of developers are also including in the Angular Renaissance is Signals. Learn more about the basics of Angular Signals here or follow an example of how to work with Signal Services here.

