As a developer, you may have gotten into a situation where you felt the need for a specific Chrome extension but when you search for it in the Chrome Web Store it doesn’t exist.
This tutorial will guide you through creating your own Chrome extension using Angular. There are two parts to this tutorial, the first one is creating the actual Angular project and building it, and the second part is uploading the built application to Chrome.
Setting Up Our Angular Project
Let’s start by generating our Angular project. In this example, we skip the generation of test files and also use standalone components (Angular project without Angular modules):
ng new my-chrome-extension --standalone --minimal --style=css --ssr=falseCreating the Chrome Manifest JSON File
When creating and publishing extensions to the Chrome Web Store, you need a manifest file (manifest.json) which gives Chrome helpful metadata about the extension you created. The manifest file is needed both for the Chrome Extension Platform and the Chrome Web Store.
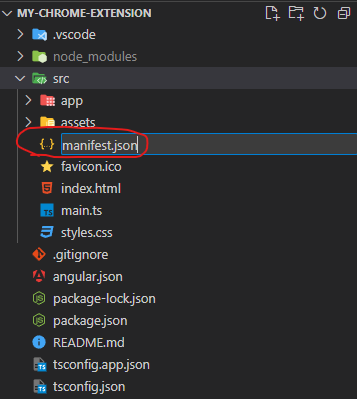
Let’s start by creating the manifest file inside our src folder. We’ll go through what properties you need to specify in the manifest file but if you want to take a look at all possible properties you can add to it, check out Google’s official manifest documentation here.

The mandatory data inside our manifest file is the following:
{
  "manifest_version": 3,
  "name": "My First Chrome Extension",
  "description": "A cool extension I made",
  "version": "1.0.0",
  "action": {
    "default_popup": "index.html"
  },
  "icons": {
    "128": "assets/extension-logo.png"
  }
}You can find the icon I use in this example here; hkjhkjh
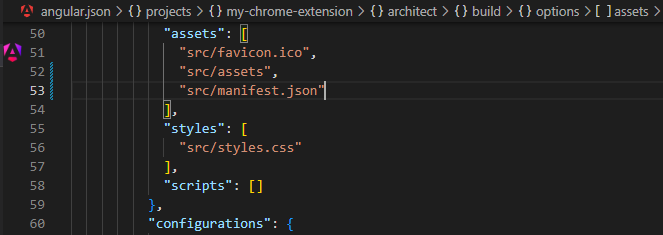
Next, we just have to make sure that we include manifest.json as an asset when building our Angular project:

Add the line, "src/manifest.json" to the assets array in the build options in Angular.json.
Building Our Angular Project
Now that we have everything in place, let’s build our Angular project:
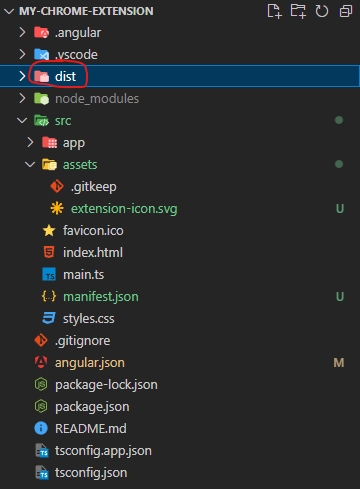
npm run buildIf you take a look at the project structure, you should now see the dist folder.

Uploading Your Angular Application To Chrome Extension
To upload your Angular application as a Chrome extension, you need to open Chrome, go to chrome://extensions and turn on Developer Mode.

This will enable you to click on three buttons (which are visible in the upper left corner). From here, you click on Load unpacked:

Now, you just have to upload the browser folder. If you used the same name for your Angular project as the one used in this tutorial, the browser folder path should be something like my-chrome-extension\dist\my-chrome-extension.
Result
After you have uploaded your Angular application, you should be able to see your extension in the list of your Chrome extensions, and as default, it should already be enabled.
I pinned the extension to my top bar in Chrome
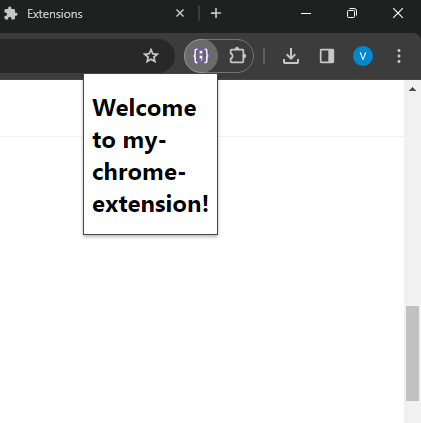
If you now click on your extension icon, a popup should open up containing your Angular application:

That’s it! You’ve just created your first Chrome extension containing an Angular application. Easy, right?
Conclusion
To summarize this tutorial, we’ve walked you through the process of creating your own Chrome extension using Angular. By just following these simple steps:
- Setting up an Angular project
- Creating a
manifest.jsonfile - Building the Angular project
- Uploading the built Angular project as a Chrome extension
You’ve successfully developed and deployed your own Chrome extension. By following just a few simple steps, your Angular application can be accessed independently of which webpage you’re currently visiting.
If you’re interested in continuing to build on this example, I’d recommend you make it a useful Angular application and then create an account in the Chrome Store (costs $5) and try to publish it. This way, you can share your Chrome extensions with the world.
Did you know that we also have a lot of tutorials if you want to learn Angular Material? You should check them out, you can find a list of some of our Angular Material tutorials here.

